-
Templates
1099 FormsAccurately report 1099 information returns and ensure IRS filing with easeExplore all templatesW-9 W-8 FormsEasily manage and share taxpayer details to streamline payments and meet IRS requirements with confidenceExplore all templatesOther Tax FormsFillable tax forms simplify and speed up your tax filing process and aid with recordkeeping.Explore all templatesReal EstateReal estate templates for all cases, from sale to rentals, save you a lot of time and effort.Explore all templatesLogisticsSimplify your trucking and logistics paperwork with our ready-to-use transportation and freight templates.Explore all templatesMedicalMedical forms help you keep patient documentation organized and secure.Explore all templatesBill of SaleBill of Sale templates streamline the transfer of ownership with clarity and protection.Explore all templatesContractsVarious contract templates ensure efficient and clear legal transactions.Explore all templatesEducationEducational forms and templates enhance the learning experience and student management.Explore all templates
-
Features
FeaturesAI-Enhanced Document Solutions for Contractor-Client Success and IRS ComplianceExplore all featuresAI Summarizer Check out the featureAI PDF summarizer makes your document workflow even faster. Ask AI to summarize PDF, assist you with tax forms, complete assignments, and more using just one tool.Sign PDF Check out the featurePDFLiner gives the opportunity to sign documents online, save them, send at once by email or print. Register now, upload your document and e-sign it onlineFill Out PDF Check out the featurePDFLiner provides different tools for filling in PDF forms. All you need is to register, upload the necessary document and start filling it out.Draw on a PDF Check out the featureDraw lines, circles, and other drawings on PDF using tools of PDFLiner online. Streamline your document editing process, speeding up your productivity
- Solutions
- Features
- Blog
- Support
- Pricing
How to Create Fillable PDF Form: Quick Step-by-Step Guide

Liza Zdrazhevska
Without long introductions, let’s see how to create a fillable PDF form in the quickest way possible. Follow the step-by-step guide below and don’t forget to look for extra info in the FAQ section. Creating a fillable PDF is easy!

How to create a fillable PDF form
Let’s get straight to the point and learn how to create a fillable form in PDF Liner. Here are all the steps:
- Create an account and log in – you can log in with Google or Facebook or create a new account with your email. It’s a necessary step before you learn how to create an editable PDF.
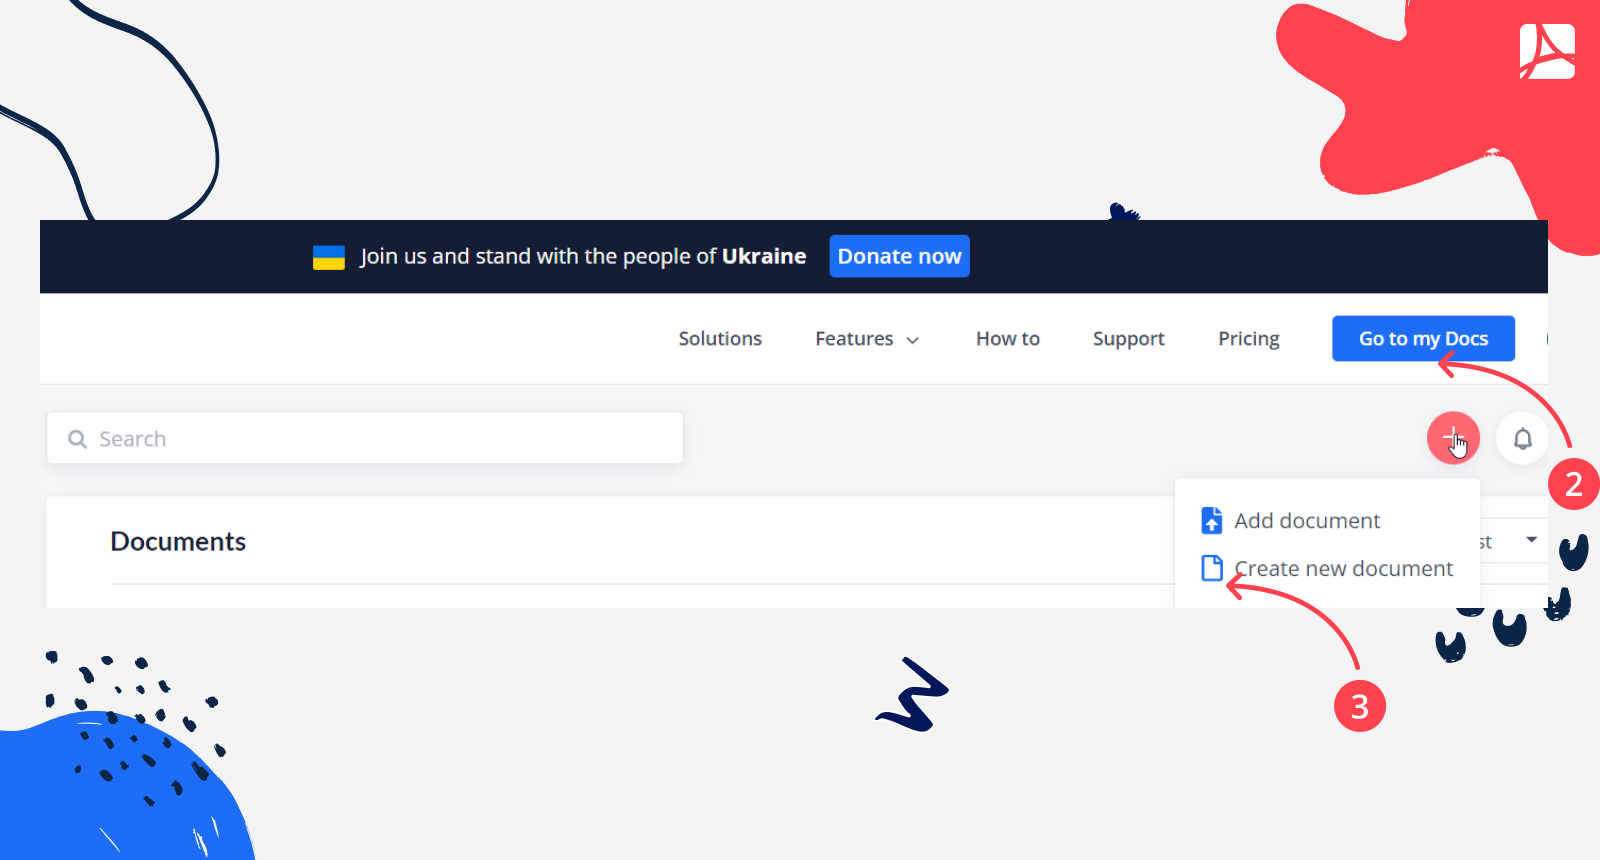
- Go to “My documents” – Move the cursor to your avatar in the top right corner and click “My documents” in the drop-down menu.
- Click “Create new document” – click the arrow next to the big red “Add document” button on the right and select “Create new document.”
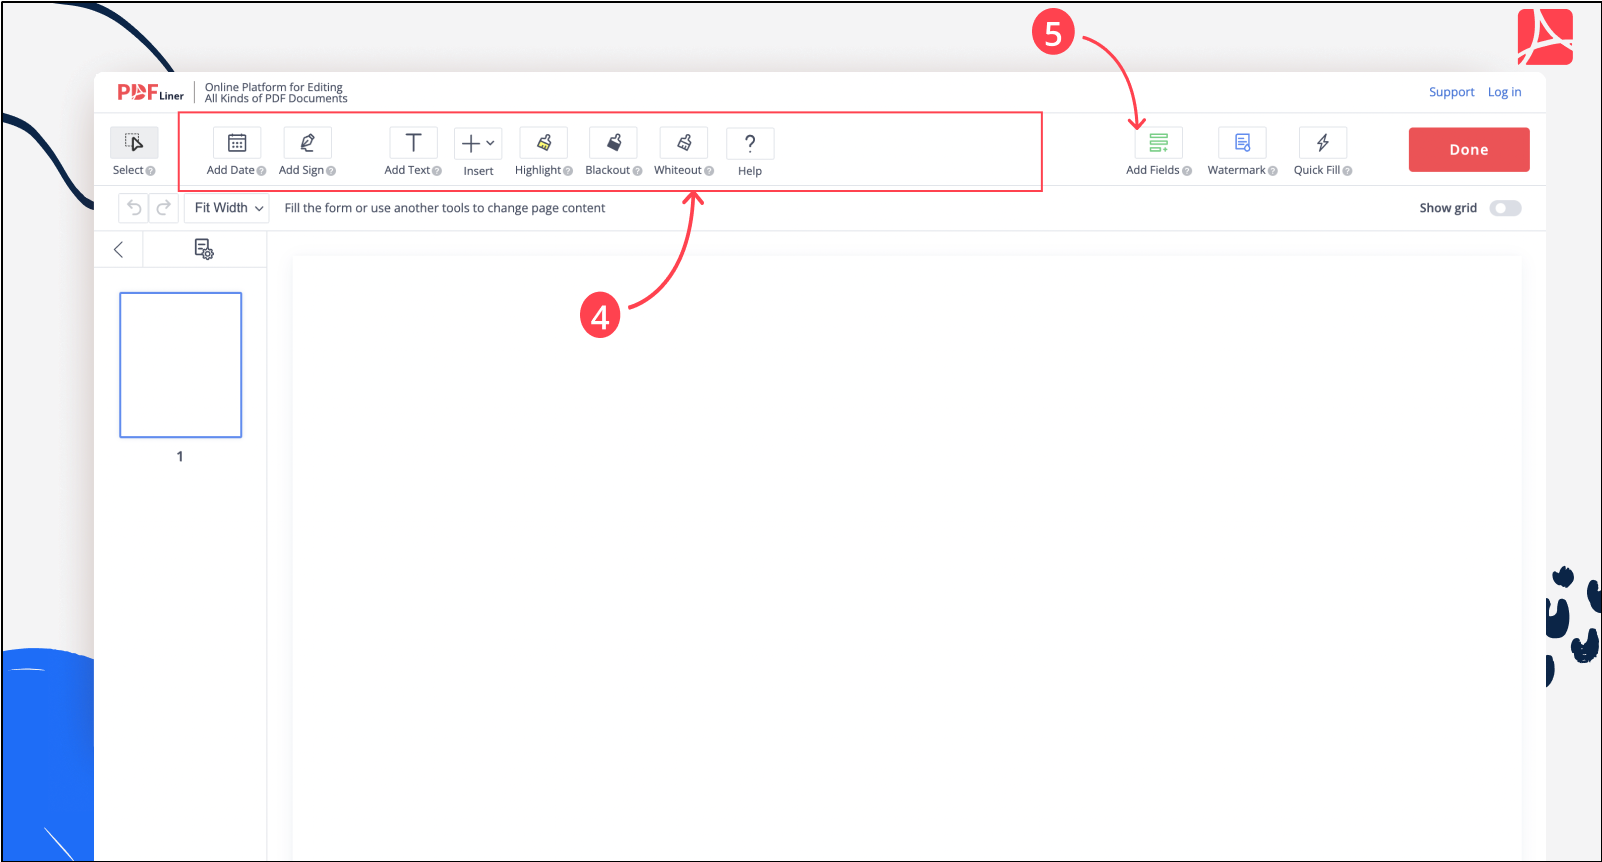
- Edit the new document using PDFLiner tools – use the tool panel at the top of the screen to add title, text lines, shapes, brand logos, links, and anything else you need.
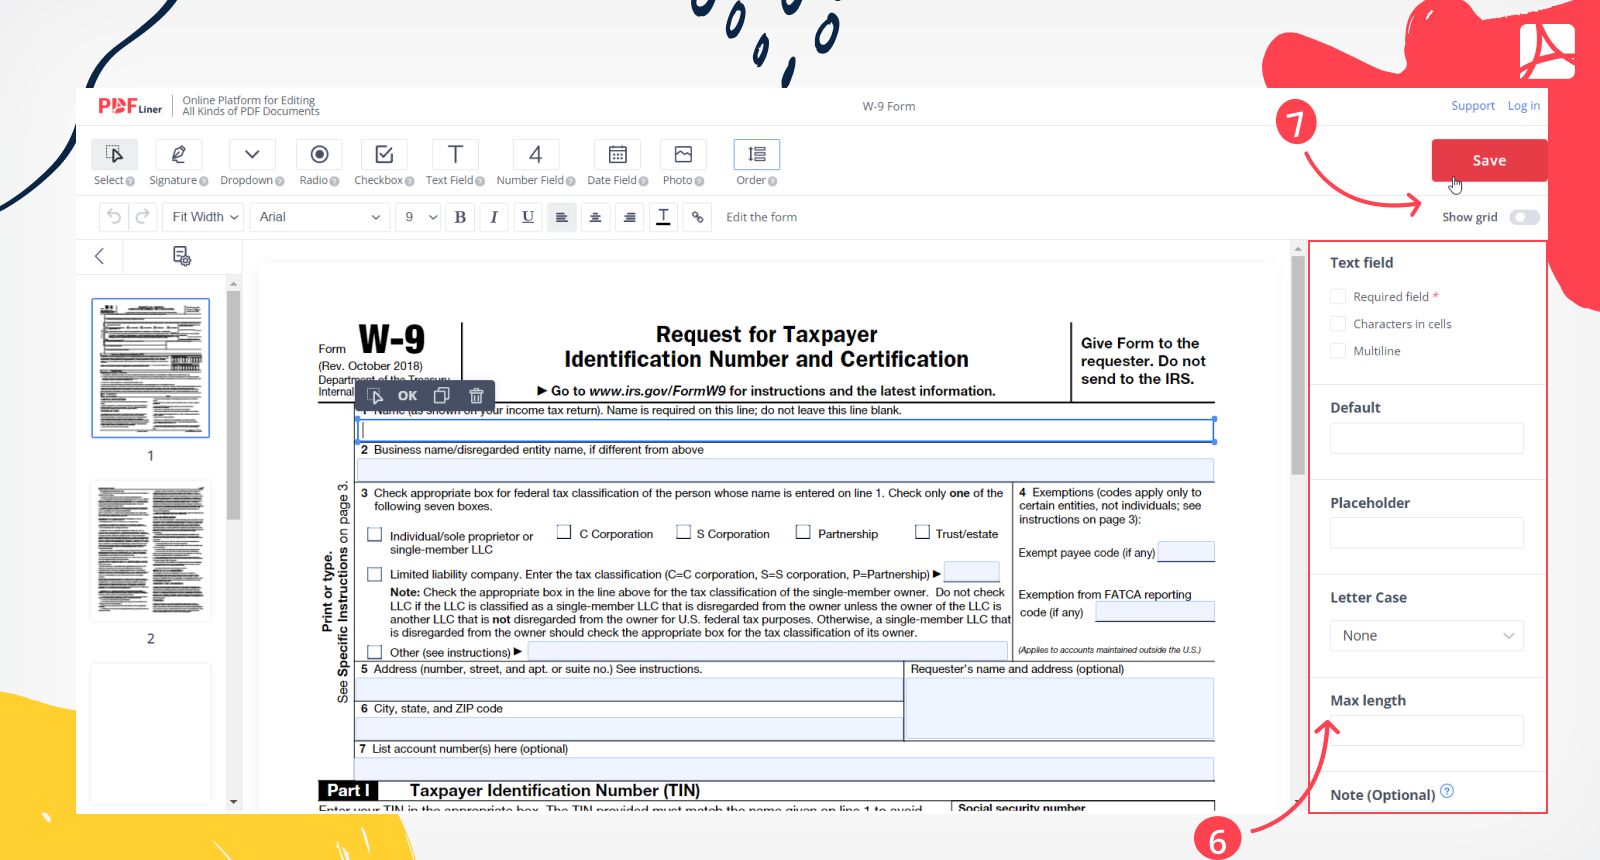
- Add fillable fields – to do this, click the green “Add fields” icon in the top right corner to open the fillable fields editor. Here you can choose fields for text, numbers, dates, signatures, and more. Simply click the needed item in the toolbox on top to use it.
- Adjust fields – you can not only resize and fill the fields with color but also adjust them using a panel on the right of the screen. For example, you can make fields multiline, select the default letter case, and adjust the max length of fields in the number of symbols.
- Save changes – once you add all the fields you need, click the big red “Save” button to apply the changes.
- Download or share your fillable form – check if everything is ok, and then click the red “Done” button to download the form or share it. In order to keep it fillable, save it only in PDF format as JPG is a non-interactive format. You can also share a direct link to the form without downloading it. That’s very useful when you need to request a signature or a certain reply quickly.
What else can I do with PDFLiner?
Now that you know how to make a fillable PDF, take a look at other features of PDFLiner. This versatile cloud service lets you:
- quickly fill in forms;
- make PDF editable for other users;
- find and fill in tax forms and other common documents from the built-in library;
- convert your PDFs to JPG;
- e-sign documents in 4 different secure methods;
- lock PDFs with a passcode;
- create watermarks for extra protection;
- annotate documents;
- share access to files and edit PDFs with up to 4 other users simultaneously;
- and even draw on pages!
FAQ’s
Here is some more info that can be useful for you.
How to make a fillable PDF mobile-friendly?
Here are the main tips for creating a mobile-friendly PDF document:
- Use 30pt font for headlines and 26pt for the main text.
- Use .25 margins.
- Compress large PDFs for faster loading.
How to type in a PDF?
Want to know how to create an editable PDF using PDFLiner? Simply click “Add Text” and start typing, or move the cursor to “Insert” and click “Text Field” to add an editable interactive text field.
How to erase in PDF?
If you want to erase text in a fillable field, select this field and press the backspace button on your keyboard. If you want to erase a non-interactive object in a document in PDFLiner, select “Whiteout” or “Blackout” tools. Besides, you can use the “Draw” option in the “Insert” menu to draw irregular shapes over other objects.
Edit PDFs Easily with PDFLiner
Create your fillable document in the online PDF editor today!


